

ソリッドステート NMR
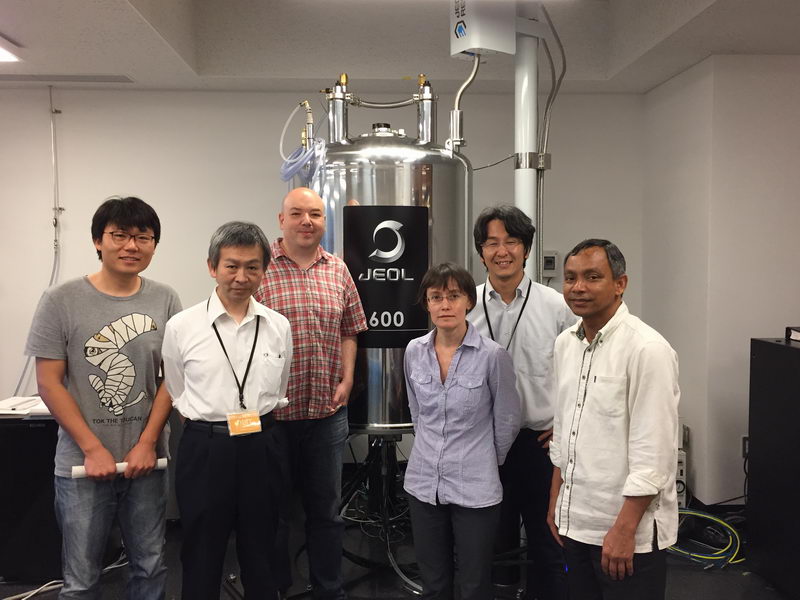
Although solid NMR training at OIST finished a couple of weeks ago, I did not have time to write a summary until now. From left to right, training participants and organizers are: Yunhui (Zhang group), Dr. Jun Ashida (JEOL), Eugene Khaskin (OIST), JEOL 600 MHz NMR, Julia, Dr. Koji Yazawa (JEOL), and Michael Roy (OIST).
See below the report on basic solid NMR training.
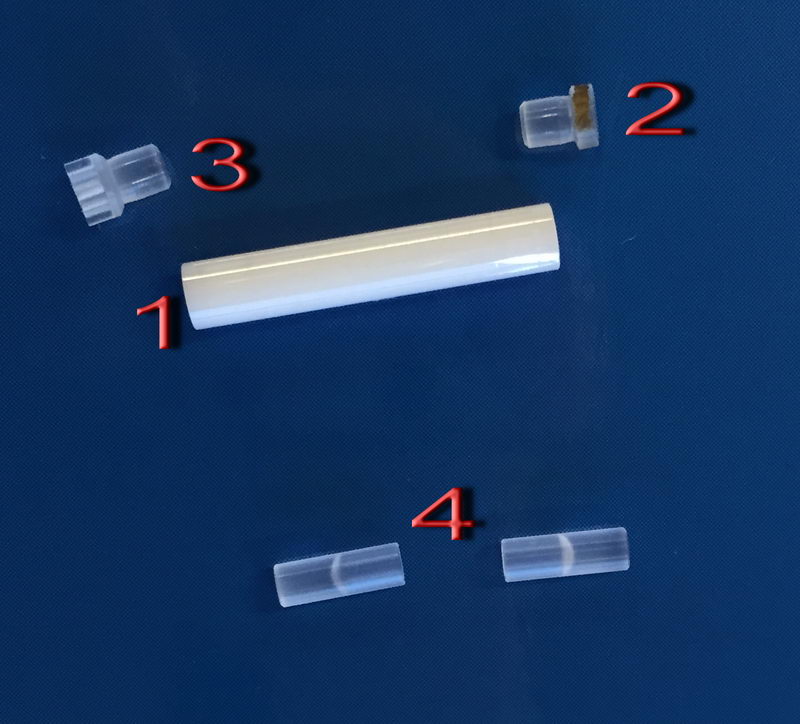
These are the tools for packing a sample for the 3.2 mm probe:
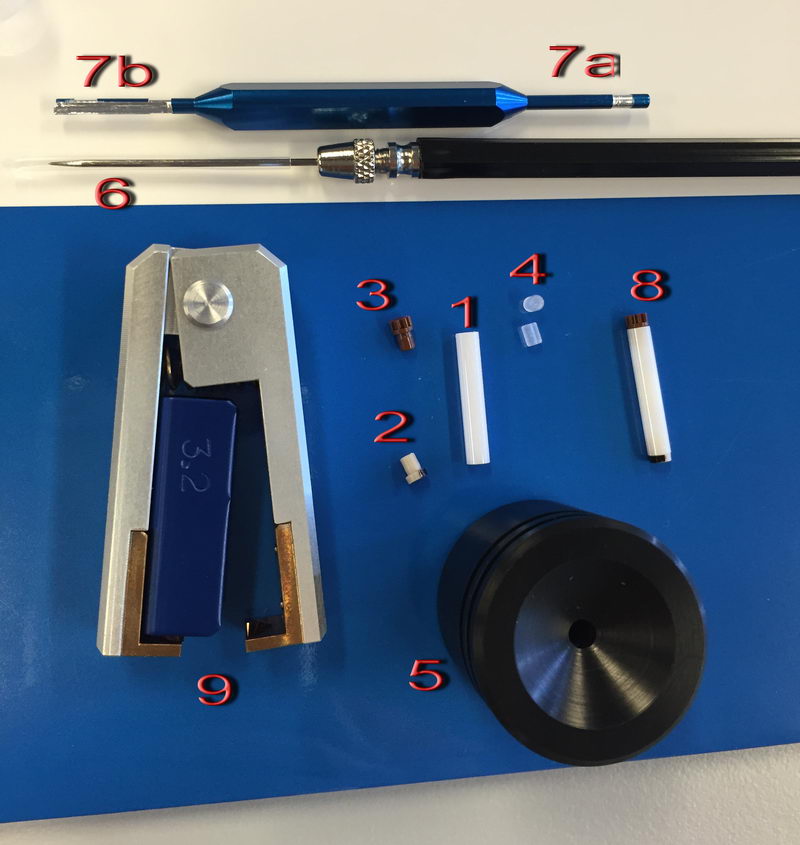
We have a very expensive zirconia tube (1) and two plastic caps, bottom cap 2 (half-painted with golden paint to read spinning speed, which we’ll have to repaint when it erases) and top brown gear-shape cap 3. First, put a bottom cap (2) on the tube (1) (by hand). Then we can put two spacers (4), especially if amount of sample is limited. To pick up spacers, use a needle (6) to pick it up by inserting it into a small hole at the center of each spacer. Put one spacer on the bottom, then mount the tube in holder (5) and put your solid sample inside by small portions, from time to time using sample pusher (7a side of the tool on the top) to tightly pack the sample. The sample pusher has two marks to tell you when there is enough sample: the white stripe has the same height as the spacer and the blue region at the tip has the same height as the cap, so if you use a spacer, the sample should be packed until the top of the white stripe. If there is too little sample, you will have problems with sample homogeneity because of air in the headspace, and if there is too much sample, it will not close tightly. Then insert the second spacer (4) on top and check again with the sample pusher that there is just enough room for the cap (you should only be able to insert a blue region on the tip 7a completely). Then place a top cap (3) on the top and gently push it by hand until it “clicks”. The fully assembled sample tube should look like (8), and you can check against light if there is no air inside and it is all homogeneous.
To remove the sample and clean the tube, use tweezers (9) to take off caps and a needle (6) to remove a spacer, but be careful not to scratch the tube, or otherwise it will crack during high speed spinning next time and contaminate the probe (in which case we have to send it back to the factory). To remove powdery sample, you can use sample remover tip (7b).
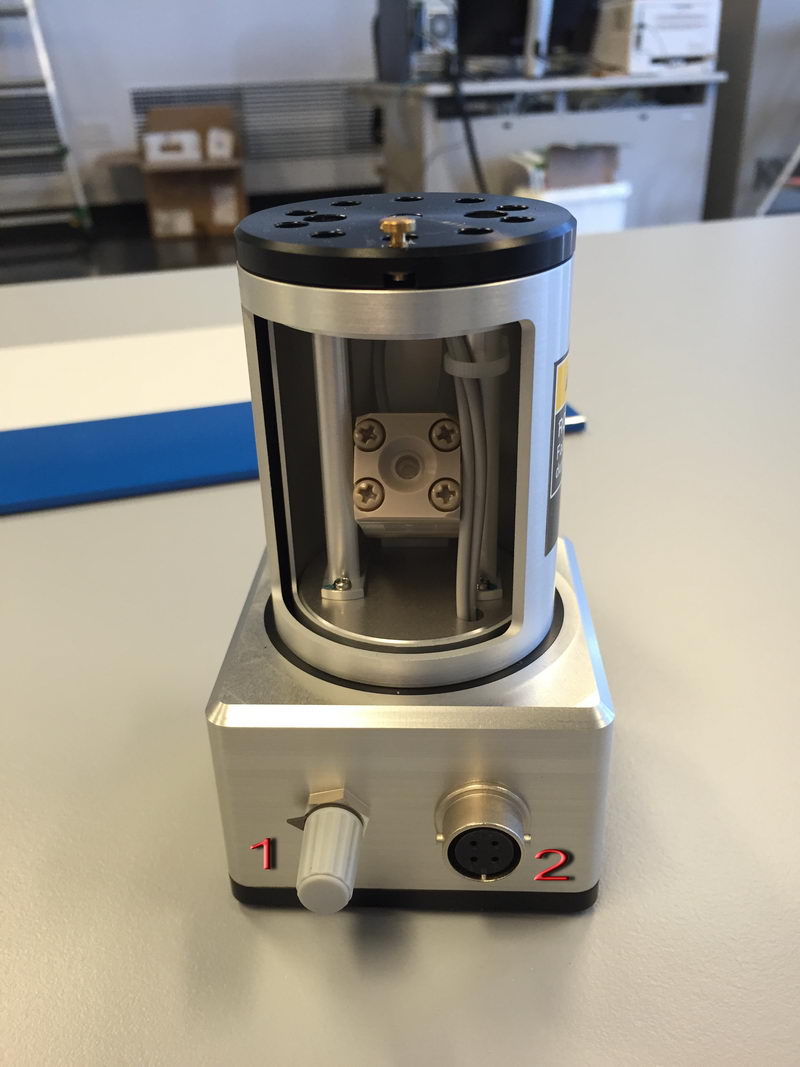
Next, we can check the sample on a bench spinner if we are not sure sample is packed well, but it was a bit tricky at the beginning. We had to play a bit with adjusting laser light intensity on a 3.2 mm bench spinner (using knob (1) below) while manually controlling air pressure before it started working properly. The adjustment is not trivial since you have to monitor that the air pressure is not too high and you need to know what values are not dangerous, so do not do it by yourself without Roy-san! Anyway, when it’s adjusted well, it does not give any trouble during testing, and you can put your sample inside the bench spinner, connect spin sensor to (2), bearing and drive cable, a control cable to the actual probe, and try to spin the sample first at 5 kHz to check. If the rate is stable and the sound is good, you can insert the sample into a probe and start using it safely. Of course, standard sample don’t need to be tested on a bench spinner, since they are already packed well and checked.
For 8 mm probe, the tools for sample packing are similar:
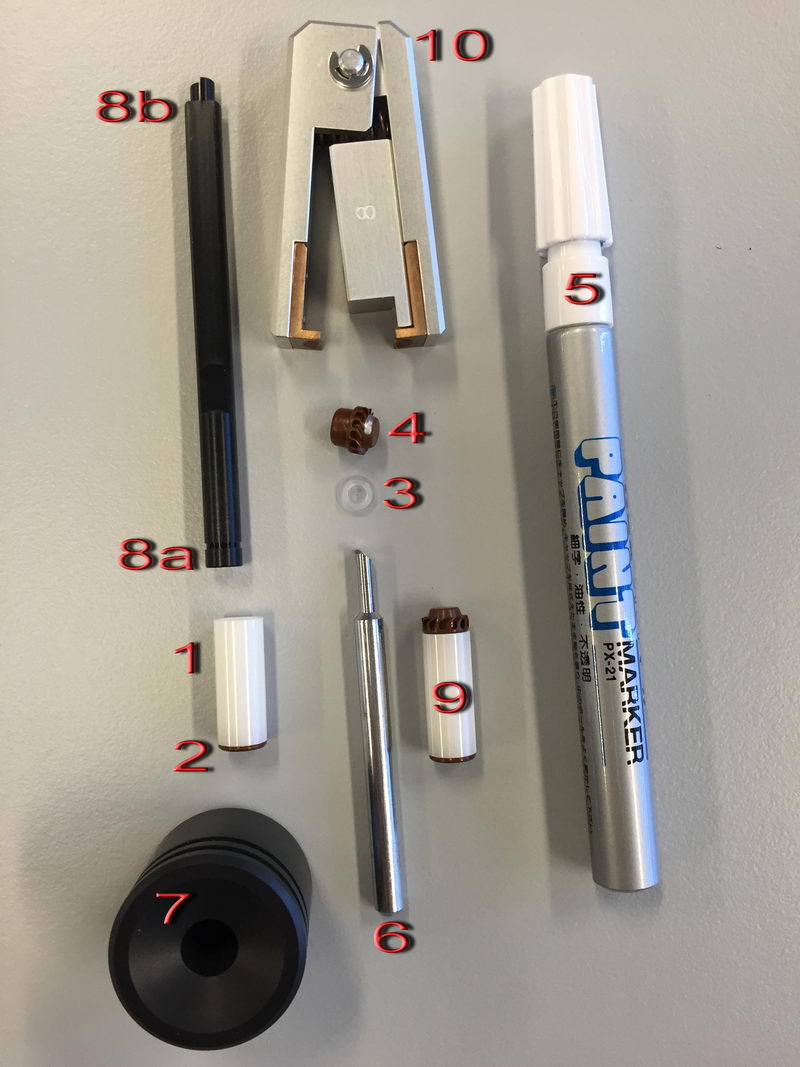
We have a zirconia tube (1) and a bottom cap (2) (I did not take it off for this picture). Usually you don’t use a spacer on the bottom, but put a spacer (3) on the top to press and make sure the surface is smooth and there is no air. Just make sure you put it the right way, with the flat side facing a sample... Then put a top cap (4) that is half-painted with silver paint (5) (again we’ll have to repaint when it erases in order to read spinning speed). To pack the sample, put zirconia tube in holder 7 and put ground sample inside in small portions, while using sample pusher (8a tip) to pack it well. Again, there are two marks on a sample pusher indicating the height of the spacer (3) and the height of the cap (4). Then put a spacer (3) and push a cap gently by hand until it “clicks”. Sample packing is much more challenging for an 8 mm tube, so make sure to check spinning rate on bench spinner! You may need to repack several times before you get good result. Don’t put sample in the probe without checking on a bench spinner, you can destroy the probe!
To unpack sample, use tweezers (10) to gently remove the caps, tool (6) to remove a spacer and sample remover (8b tip) to remove solid sample from inside the tube. Then the tube can be gently cleaned with solvents, kimwipe and dried with compressed air.
For packing organic solvent-containing gel samples, hydrogels, and semi-liquid kind of sample, we need to use a different type of cap (seal caps) with the 3.2 mm tube, as the organic solvent will destroy material of brown caps and penetrate through them, especially during spinning, again, contaminating the probe.
We have one set of seal caps that are used for this:
Zirconia tube (1) is the same, but the fluoroplastic caps (2; bottom cap) and (3; top cap) need special handling. Be gentle with them, and they are softer, and don’t just use tweezers right away to remove the caps. First, lightly put the cap on tube, then cool it down in liquid nitrogen for a few seconds, take it out and push by hand gently. To take off the top cap, immerse the top cap only in liquid nitrogen for a few seconds, then remove it by hand, not by tweezers. If it resists, cool it down again. To remove a bottom cap, also cool it down in LN2, but to remove it, you can gently apply tweezers for 3.2 mm. Be careful not to lose seal caps, since they are white, semi-transparent and expensive, and we only have one set of them for all groups. For packing mayonnaise-like samples, we can also use (4), where you can scoop your liquid-like sample inside each half and insert it with a sample being at the center and spacers at the top and bottom.
Now we can move on and show some standard experiments as examples.
1) First, we used an adamantane sample as a standard for resolution adjustment (shimming) and chemical shift reference, and also to calibrate 90 deg pulse for 1H and 13C. First, tune the probe manually on appropriate nucleus so that reflection value is below 10 (if it is above 10, you can damage the probe). Make sure acquisition time is short, less than 100 ms (with 100% decoupler power) for decoupled experiments, otherwise you will burn the probe! (For some resolution adjustment experiments, if the decoupler power is reduced to 50%, we can in certain cases change the acquisition time to 190-200 ms, but be careful with that and when dealing with acquisition times longer than 100 ms, consult with Roy-san and your PI first). For adjusting chemical shift in 13C NMR, we change Z0 to make sure the adamantane peak comes out at 29 ppm, and this is something you may need to do every 1-2 days when running solid state NMR in order to have correct chemical shift reference prior to running an actual sample. We did manual shimming only on Z1 and Z2 with adamantane (powder samples are somewhat less sensitive to shimming than solution samples, so it can be enough). For a really good shim check, you need to use a high spinning speed of 15 kHz (we roughly checked on 5 kHz since it was just a test).
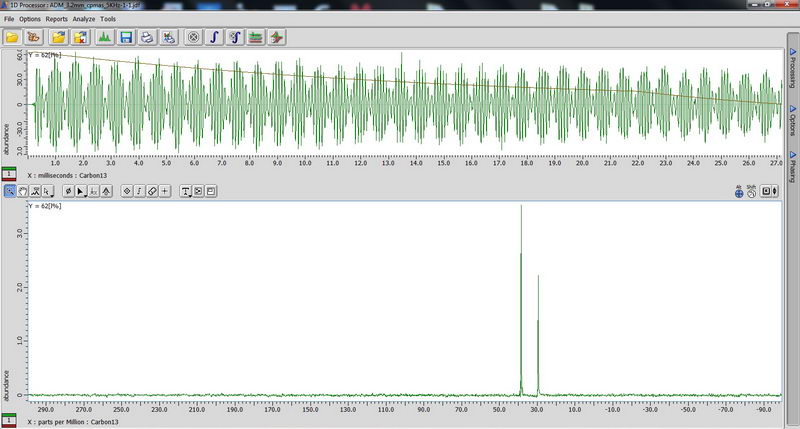
90 degree pulse calibration is not something you need to do routinely, but maybe once a year, so we can do next one in April 2017 with Roy-san. But anyway, here is how it looks for proton on adamantane sample:

And carbon:

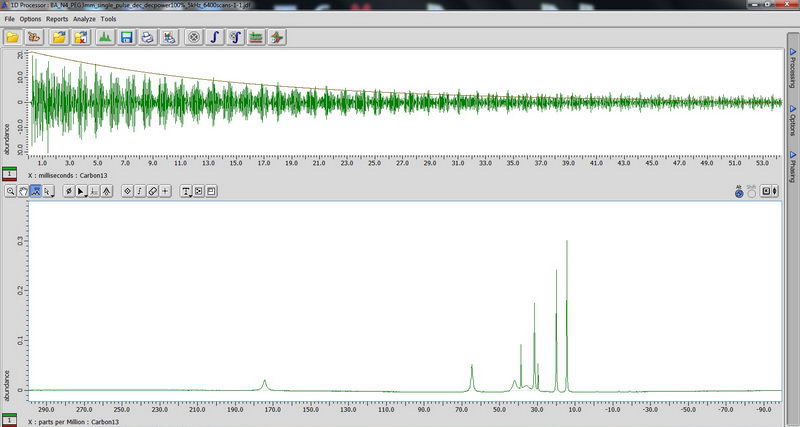
2) Next, DDMAS (dipole decoupled magic angle spinning) on a polymer sample. Again, for DDMAS, make sure that acquisition time is short, less than 100 ms (when decoupler is set to 100% power), otherwise you’ll burn the probe. Consult with Roy-san and your PI. To suppress background signals, check “depth2” (then number of scan should be multiple of 16). Broad peaks in DDMAS belong to less mobile regions and sharp peaks indicate mobile regions.
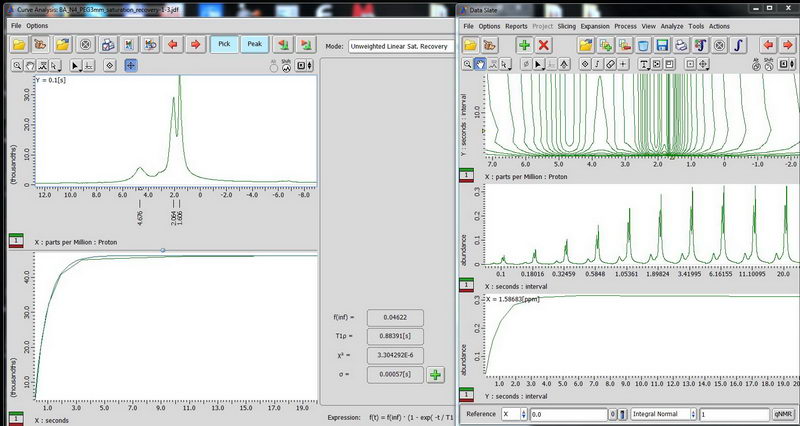
3) Determination of proton relaxation time by saturation recovery. Choose saturation recovery experiment and make an array for the interval value from 0.1s to 20s, exponential with 10 points. This time, acquisition time does not have to be less than 100 ms, since there is no decoupling. We need to know the proton relaxation time in order to set up the parameters for CPMAS (where relaxation delay is set to be 1.3 times proton T1). (look up T1ρ value after curve analysis, that is your T1).
4) Determination of 13C relaxation time based on DDMAS (for mobile samples). Use saturation recovery decoupled experiment and make an array for the interval value (let’s say, 0.1s to 20s, exponential, 10 points for the beginning). For DDMAS experiment, make relaxation delay about 5 times of your longest carbon T1 to enable quantitative analysis.

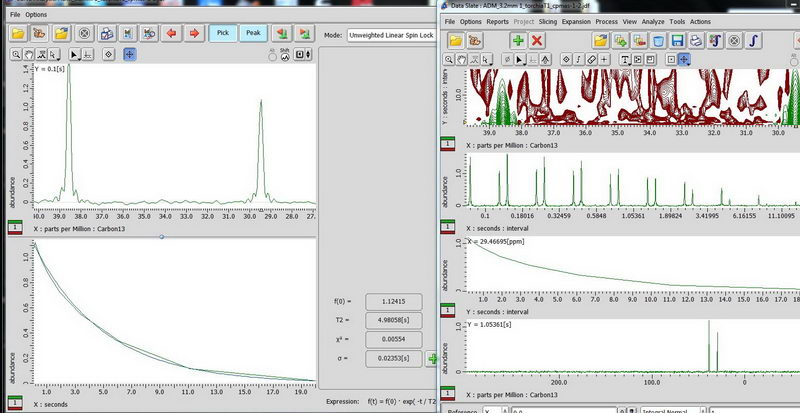
5) For non-mobile samples like adamantane, use CPMAS-based determination of carbon relaxation time. (CPMAS – cross polarization magic angle spinning). Use Torchia T1 experiment, make an array for the interval value (0.1 s to 20 s is okay for the start, 10 points, exponential). On the plot in curve analysis window, look up what is labeled as “T2” value, this is actually your T1 for carbon (don’t get confused about labels, the curve analysis function is shown for spin lock, but it’s the same function, so we apply it here).
6) Finally, CPMAS for adamantane. CPMAS is most suitable for non-mobile samples and it does not allow quantitative analysis like DDMAS, but allows to do the experiment in reasonable amount of time. The relaxation delay of CPMAS is based on proton (1.3 * proton T1).
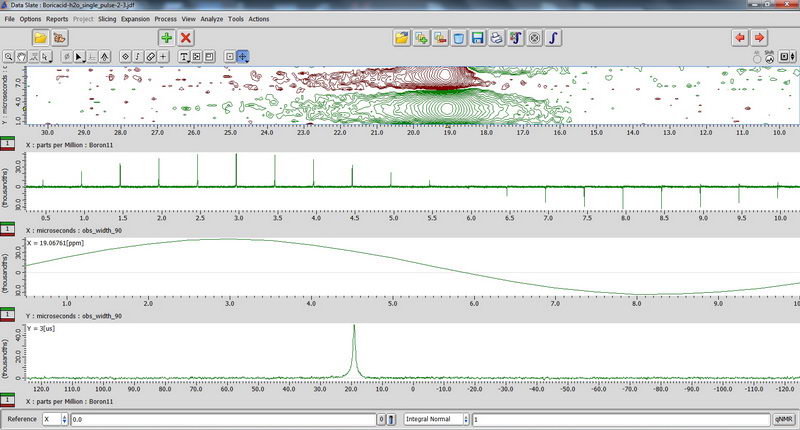
7) For 11B NMR, since it’s a quadruple nucleus, the pulse width will be different for nuclei in different environment, and if we try to apply 90 deg pulse or close to it, some signals may disappear (since it will be 180 deg pulse for them…). So we apply 15 deg pulse to see most of the signals, short relaxation delay (relaxation is fast; 0.1s relaxation delay is enough), and large number of scans. The standard for chemical shift reference is either borax (aqueous) or boric acid (aqueous). Don’t spin aqueous standards! (No need, since they are liquids; and for other reasons in order to not contaminate the probe with a sample escaping from tube during spinning). 90 deg pulse calibration with boric acid non-spinned standard (again, just necessary to repeat once a year with Roy-san):
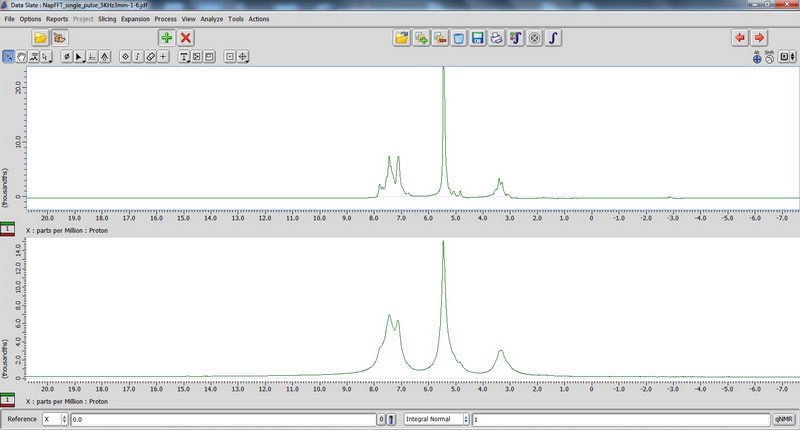
8) Finally, we played a bit with hydrogels using seal fluoroplastic caps for 3.2 mm tube. Those that contain a lot of salt can be quite dangerous, because the probe could not be tuned well and the reflection value was above 10. For samples like this, with high reflection value, only single pulse experiments should be done (in the absence of heteronuclei, proton NMR is fine, but don’t do DDMAS on carbon!). Decoupled experiments will burn the probe. The hydrogel sample looked like a liquid (almost a homogeneous solution), but it actually showed improvement of resolution during spinning, which could tell us that it is not just a homogeneous solution (supposedly, there should be some self-assembly happening in water with this compound, but since it’s not my sample, I cannot comment). Broadened water signal for some of the samples could also indicate interaction of the solvent with the compound. In the spectra below, the top one is with spinning, and bottom one is without spinning.
Again, thanks to Yazawa-san and Ashida-san for the training. If you need to get a training for solid NMR and permission to run the experiments, contact Roy-san and discuss with your PI, we will conduct a separate training for all interested groups.