How to log onto VPN for Linux
Please request VPN access using the following webform: https://groups.oist.jp/it/vpn-access-request
Installing the Prerequisites
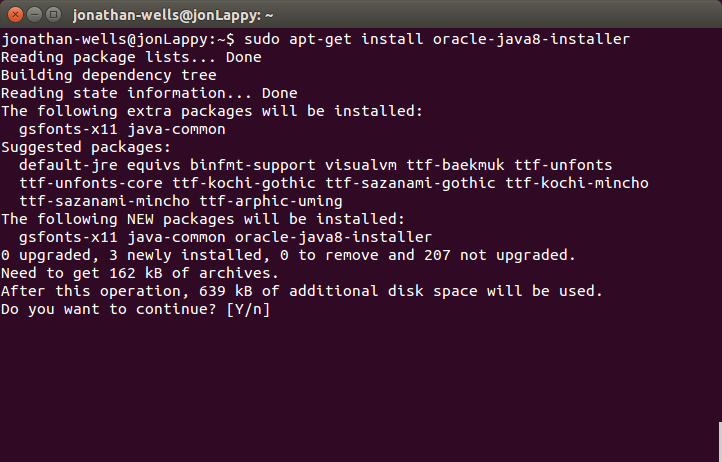
- Before you can access the VPN, you will need to install Java 7. To do this, open the Terminal window and enter the following commands to add the Oracle Java repository to linux, update the repository list, and then to install Java 8:
sudo add-apt-repository ppa:webupd8team/javasudo apt-get updatesudo apt-get install oracle-java8-installer
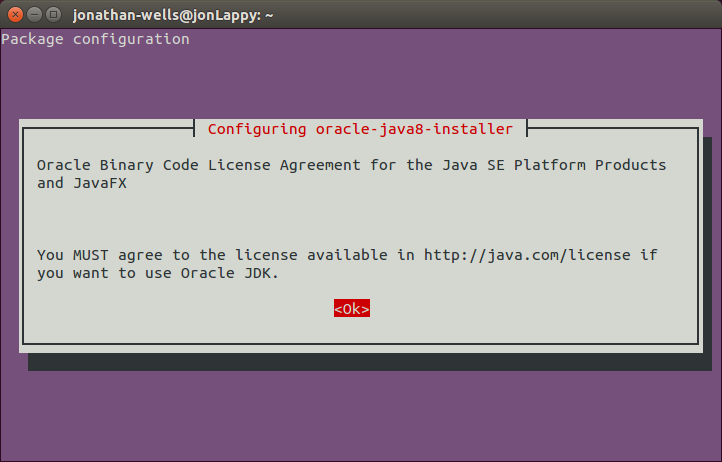
- During the installation, you will be asked to accept the Oracle Binary Code License Agreement. Press the return key at the page below and then highlight the <Yes> link and press enter to accept the agreement.
- Afterwards, you will need to set the default Java runtime for you system by entering:
sudo apt-get install oracle-java8-set-defaultYou may check your Java version by typing:java -version (Note: Your version number may differ.)
java version “1.8.0_40″
Java(TM) SE Runtime Environment (build 1.8.0_40-b25)
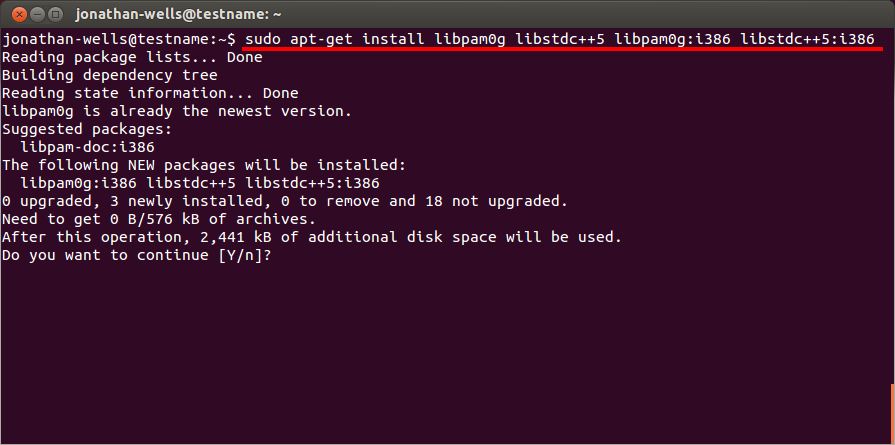
Java HotSpot(TM) 64-Bit Server VM (build 25.40-b25, mixed mode) - Finally, we need to install the libraries that the VPN will be using. Run the following command to install them:
sudo apt-get install libpam0g libstdc++5 libx11-6 libpam0g:i386 libstdc++5:i386 libx11-6:i386
- You can close the Terminal after the installation finishes.
Add vpn.oist.jp to the Site Secuirty Exceptions for Java
In later releases of Java 7 and Java 8 a site security exception setting must be added before the vpn client can run, please complete the following proccedure carefully, or you will see "Java not found" errors when you attempt to connect.
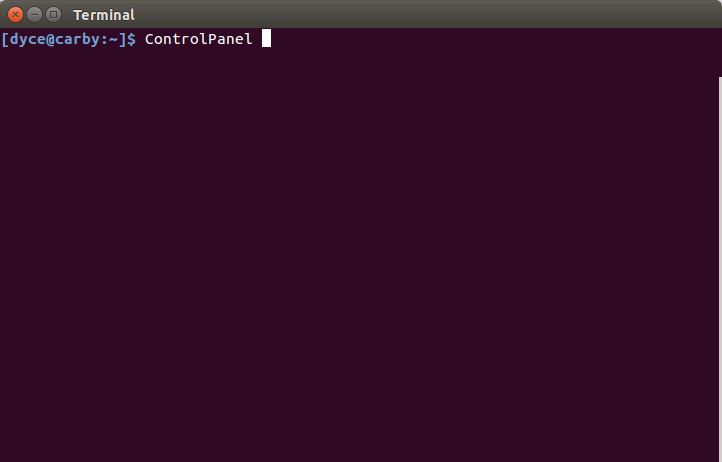
- Start the Java Control Panel from the terminal
- Select the security tab
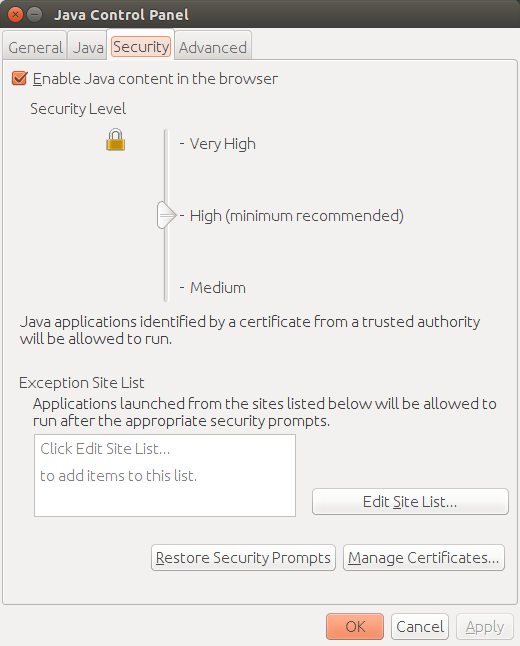
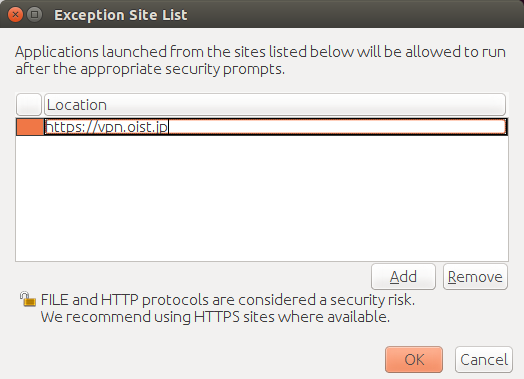
- Add the following site to the "Exception Site List": https://vpn.oist.jp/ then click OK
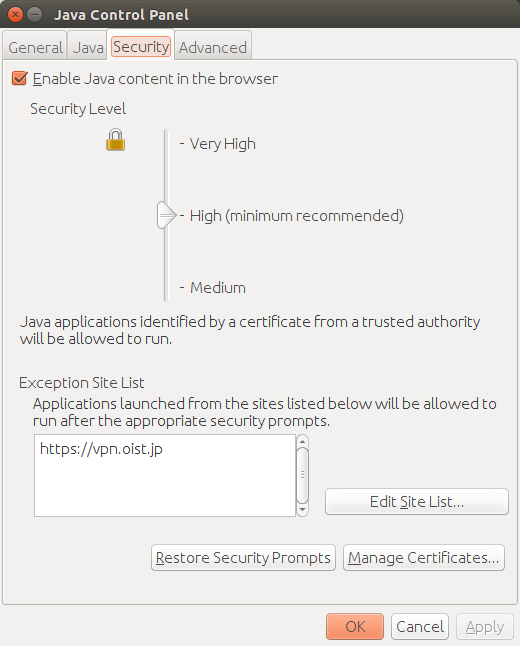
 Then click OK
 - Click Apply then OK
Logging onto the Checkpoint VPN-
- Open your favorite web browser and navigate to: https://vpn.oist.jp (In the guide, we are using the Safari browser.)
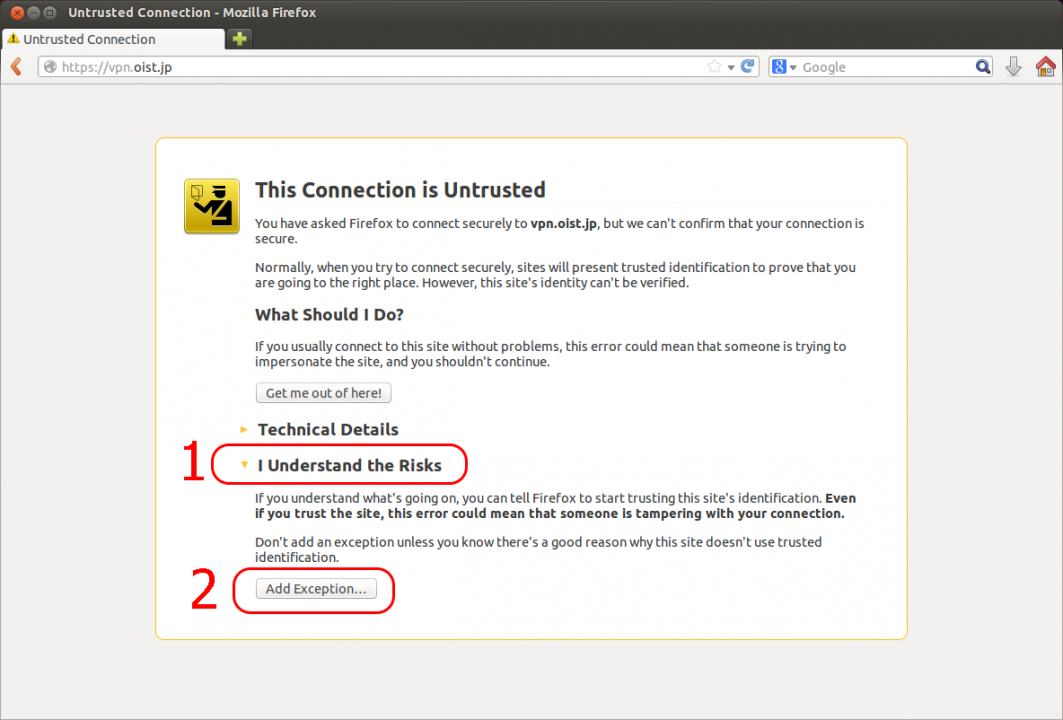
- An error may be displayed stating: "This Connection is Untrusted".
Please press the 'I Understand the Risks' dropdown menu, then click the 'Add Exception' button.
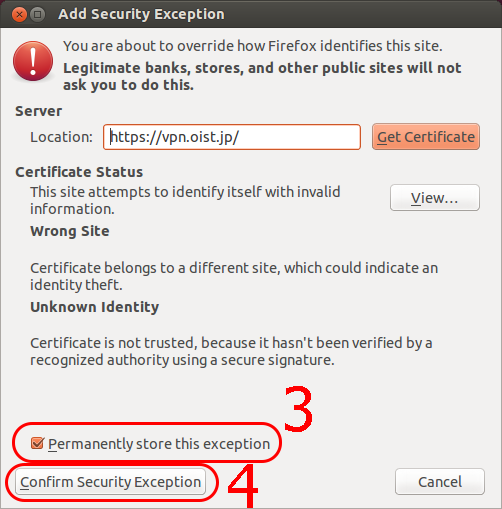
- Click on the 'Permanently store this exception' checkbox, then click the 'Confirm Security Exception' button.
- You will then be presented with a logon screen.
Please enter your OIST username and password, then press the 'Sign In' button.

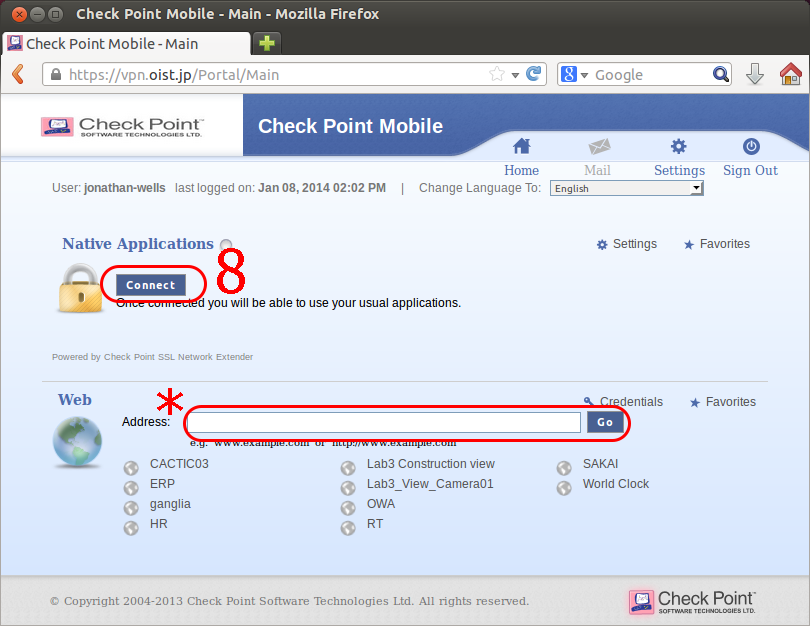
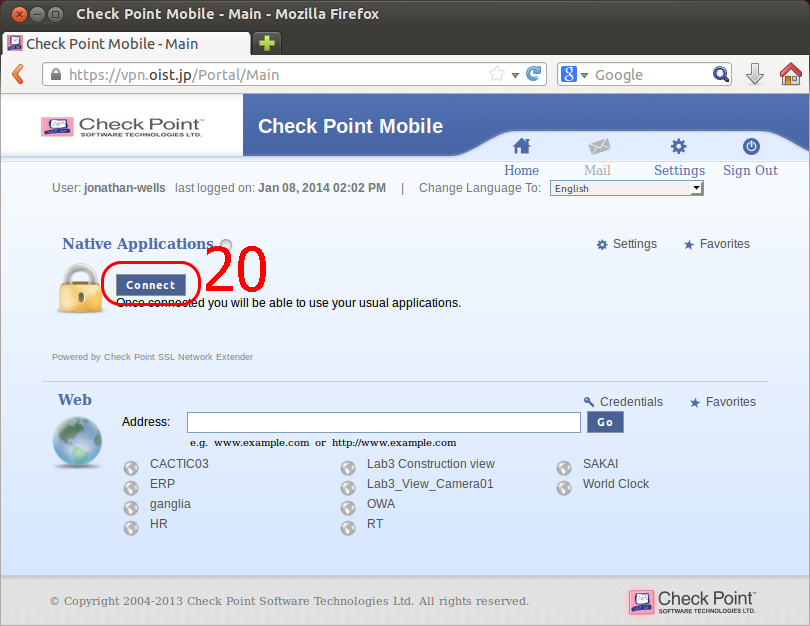
- You are now logged onto the Checkpoint system. If you click the 'Connect' button, you will connect to the OIST VPN.
*If you only need to view an internal webpage, you can use the proxy service at the bottom of the page without fully connecting to the VPN. (If you only need this service you can end the guide at this point.)
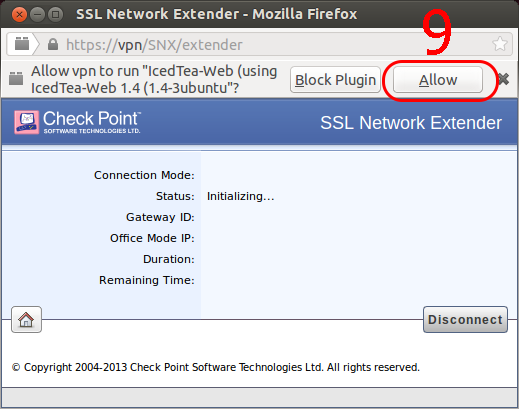
- If you clicked the 'Connect' button, a new window will popup. If you are asked for permission to run the 'IcedTea' plugin. Please allow it by clicking the 'Allow' button. (Many popups will follow, but most will only appear once if you allow it to remember your settings.)
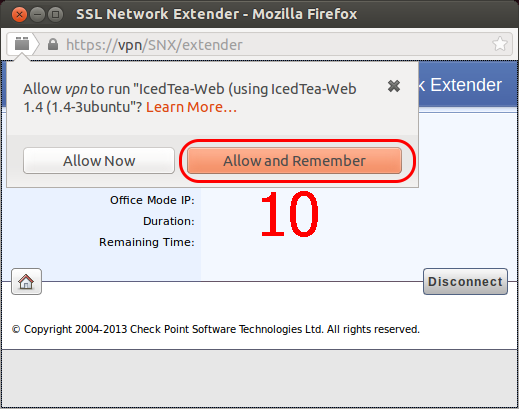
- You may be asked again to allow the 'IcedTea' plugin to run. If so, please click the 'Allow and Remember' button.
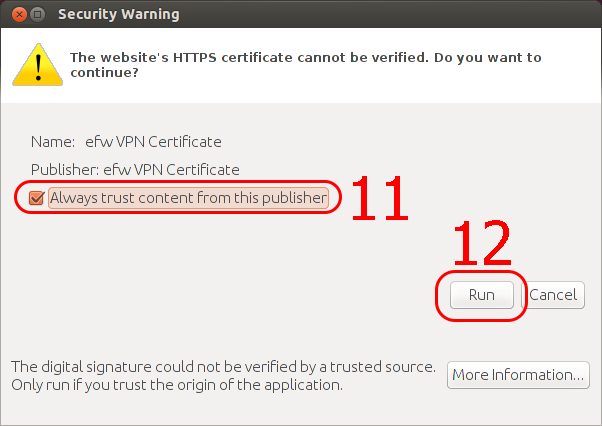
- A security warning will popup alerting that the website's certificate cannot be verified. Please click the 'Always trust content from this publisher' checkbox, then click the 'Run' button.
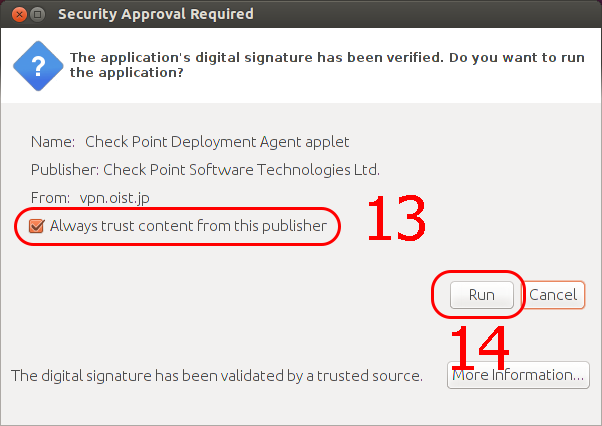
- Another security warning will then popup alerting that the website's certificate has been verified. Please click the 'Always trust content from this publisher' checkbox, then click the 'Run' button again.
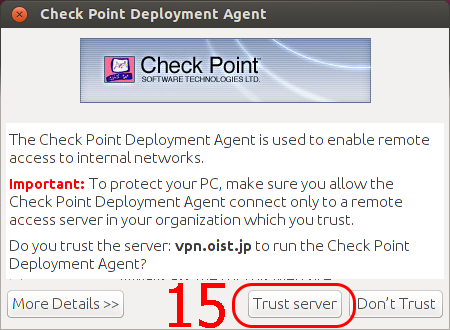
- The next popup will be the Check Point VPN software asking if you trust the server 'vpn.oist.jp'. Please click the 'Trust server' button.
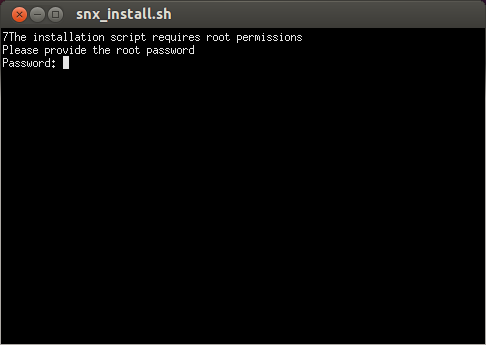
- Afer a few seconds, a 'Terminal' window will open asking for your root password. This is the VPN wanting to install the SNX software package to your computer. (It will most likely fail.)
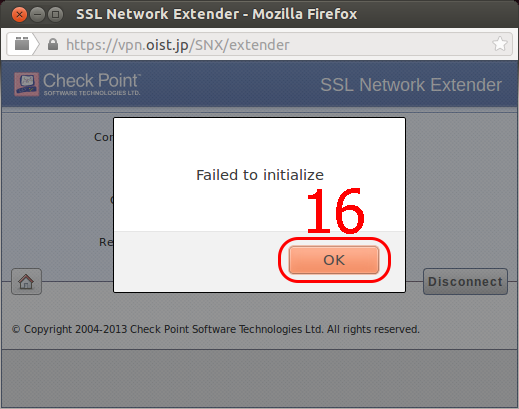
- A dialog will popup saying 'Failed to Initialize'. Please press the 'OK' button to close the popup.
(If this dialog doesn't appear and your connection box looks like the last image in this guide, then you have successfully connected and can quit this guide.)
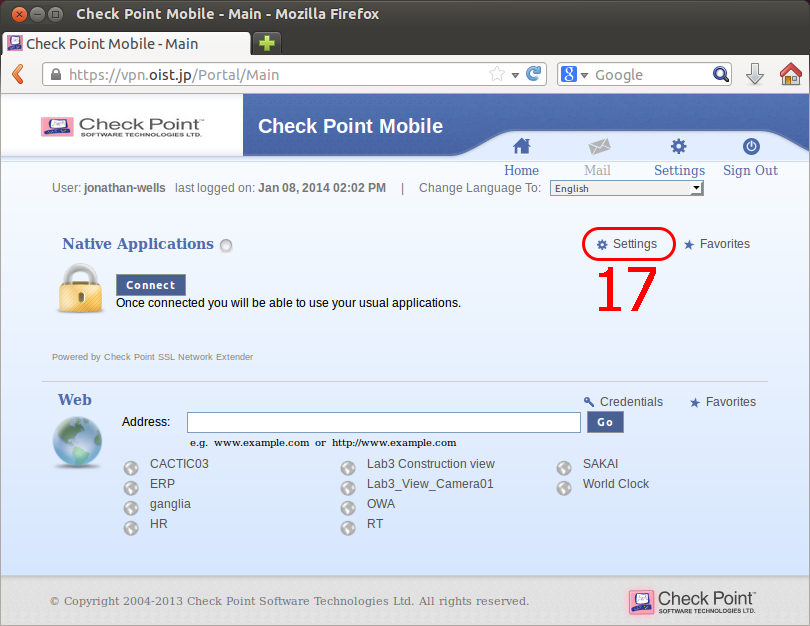
- We will need to manualy install the SNX software.
On the main page, click the 'Settings' button.
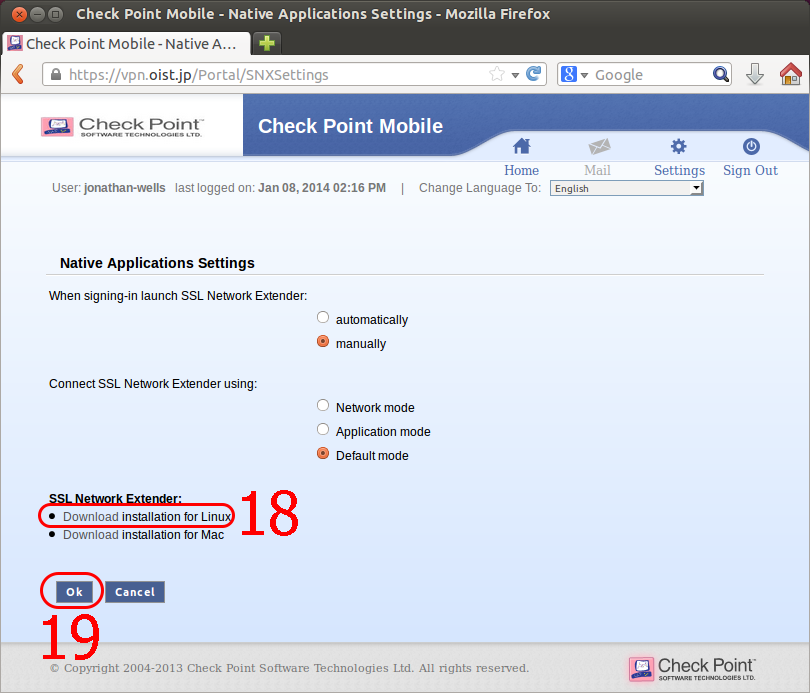
- At the lower left of the screen, blick the 'Download installation for Linux' link.
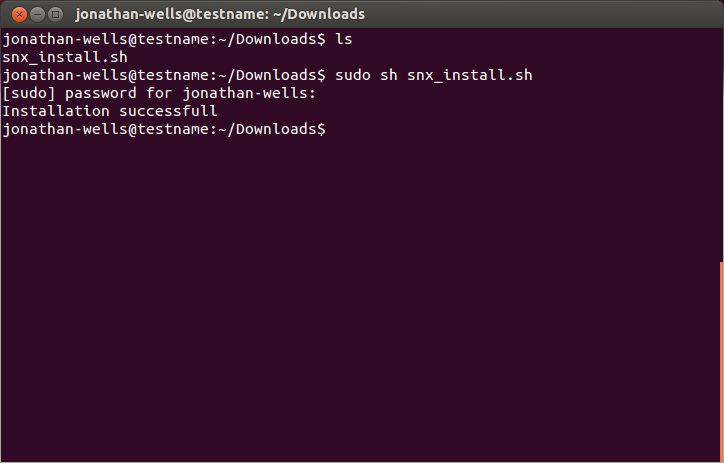
- Open up the 'Terminal' again, navigate to the folder where you downloaded the file, and run the commands:
chmod +x snx_install.shYou can close the Terminal if the installation was a success. (No errors)
sudo snx_install.sh
- Please click the 'Connect' button once more on the VPN webpage.
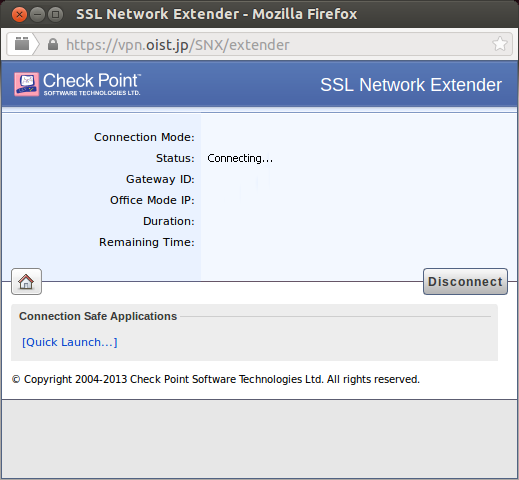
- The small window will come up again, with a few of the previous popups.
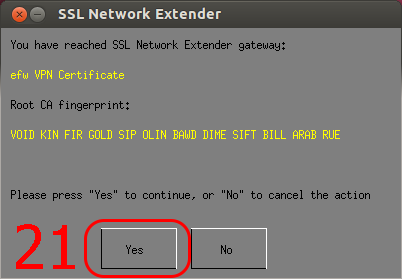
- The SNX software will pop up a window asking if you wish to continue to connect. Please click 'Yes'.
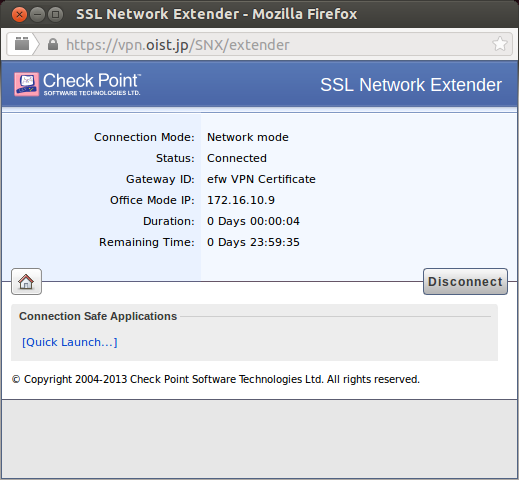
- The VPN should now connect, and the the small window will display your VPN information and how long you have been connected. To disconnect from the VPN, please click the 'Disconnect' button.
**Note: This window must remain open in order to stay connected to the VPN. If you close it, you will automatically be disconnected.